Using the VitalPBX Connect Application
Now that you have set up your VitalPBX installation with the QR codes, we can move over to the VitalPBX Connect application.
The process is the same between iOS and Android. This article will use an iPhone as an example, but you can use an Android device.
First, open the VitalPBX Connect application on your device.
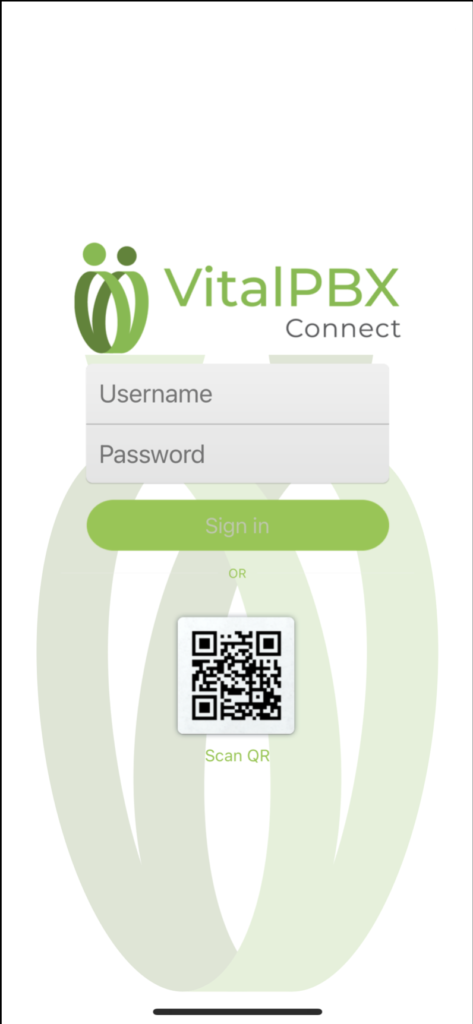
The first time you open the application, you will be greeted by the login screen. Here you will sign in with your provisioning information. For security purposes, VitalPBX generated a long random username and password. This is why using the QR code is much easier to provision your device.
Click on the Scan QR button. This will ask for Camera permissions. Once you scan the QR code, the application will be provisioned, and your extension will register.

Once the device is provisioned, you will see the following screen.

The main screen for the application is the Keypad screen. Here you can initiate calls and check your voicemail.
On the top side, you will see your extension’s name and the settings menu, represented by three dots.

If you tap on your extension’s name, you will see the Do Not Disturb option, which can be enabled or disabled. As well as information about your extension and voicemail.

You can tap the Close button at the bottom to close this screen.
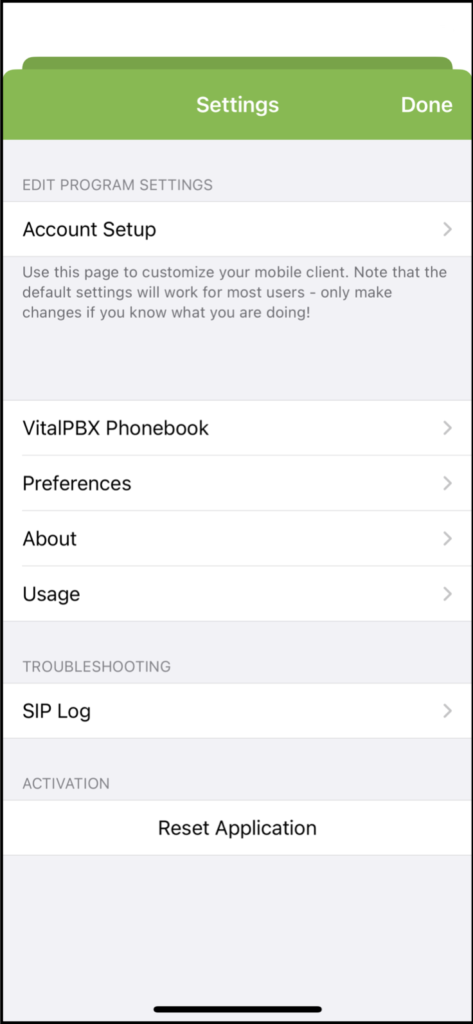
If you tap on the Settings option, represented by the three dots, you will see various settings for the application. You will likely access the VitalPBX Phonebook and the Preferences options.

Back in the Settings page, if you click on Preferences, you will see various options you can configure to change the application’s behavior.

Here you can change Ringtones, Call Recording options, Call Forward, add Do Not Disturb rules, and much more. We encourage you to check out all available options to customize your VitalPBX Connect experience.
You can save any changes by tapping on Done.
Back on the application’s main screen, you can see other pages you can access at the bottom.

The first one from the right is the Quickdial page.
Here, you can add contacts for quick access to call them. To add a quick-dial contact, tap on Edit and then the green plus sign.

When adding a new quick-dial contact, you can enable the BLF (Busy Lamp Field) option to monitor their presence. This has to be a local extension number to use the BLF feature. You can also add a profile picture for this quick-dial contact.

Next is the History page. Here you can see your complete call history.
You can edit the list, remove items, and export the list using the share button in the upper right-hand corner.

In the middle, we have our Keypad, as mentioned before. Here you can initiate calls. If you double-tap the green call button, you will recall the last number you dialed.
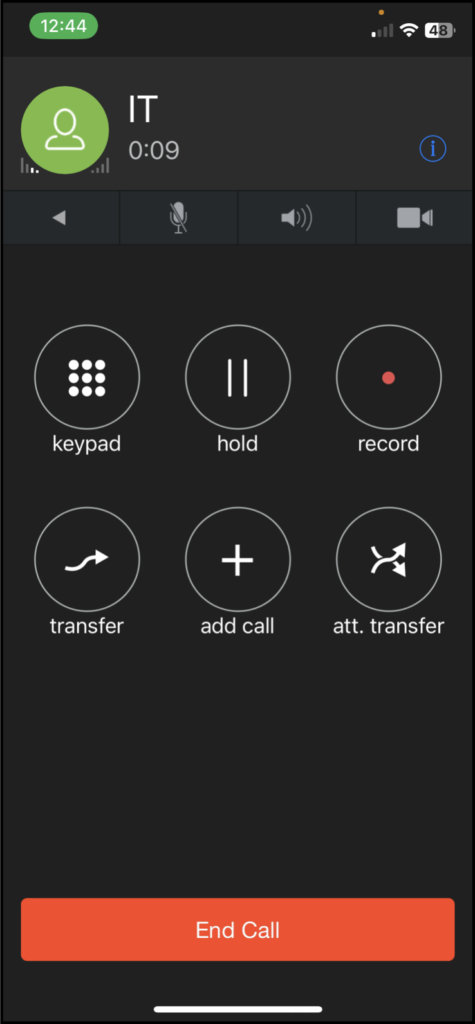
During a call, you will see the following screen.

While on a call, you can mute/unmute, turn on speaker mode, and initiate your video. You can also show a keypad to perform DTMF actions, place the call on hold, record the call locally on your device, do attended or direct transfer, and add calls to create a 3-way conference. At the bottom, you can End the Call.
Next, we have the Contacts page. Here you will see the contacts stored in your mobile device and another tab for the central phonebook we added through the application’s settings.

Was this article helpful?
That’s Great!
Thank you for your feedback
Sorry! We couldn't be helpful
Thank you for your feedback
Feedback sent
We appreciate your effort and will try to fix the article